Ensuring our application is thoroughly tested and working as it should is of crucial importance in terms of delivering an application. The application must not only meet our clients requirements but must also be properly maintained and stand through the test of time due to robust testing practices.
Again, our weapon of choice were the official guidelines from the Microsoft Holographic team regarding testing an application on the HoloLens which provided checklist-style lists to ensure high-quality for our application.
Below we will outline the process we used to ensure that all of the components of our application work as they should and are not only functional in terms of providing value to our users but also ensure that the overall experience is comfortable and enjoyable.
Testing our application
Our application consists of three main scenes.
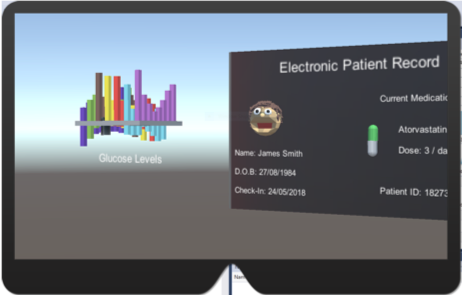
1. The patient scene which is the reference scene for the junior doctor to see information about a specific patient, and learn more about him/her prior to the ward
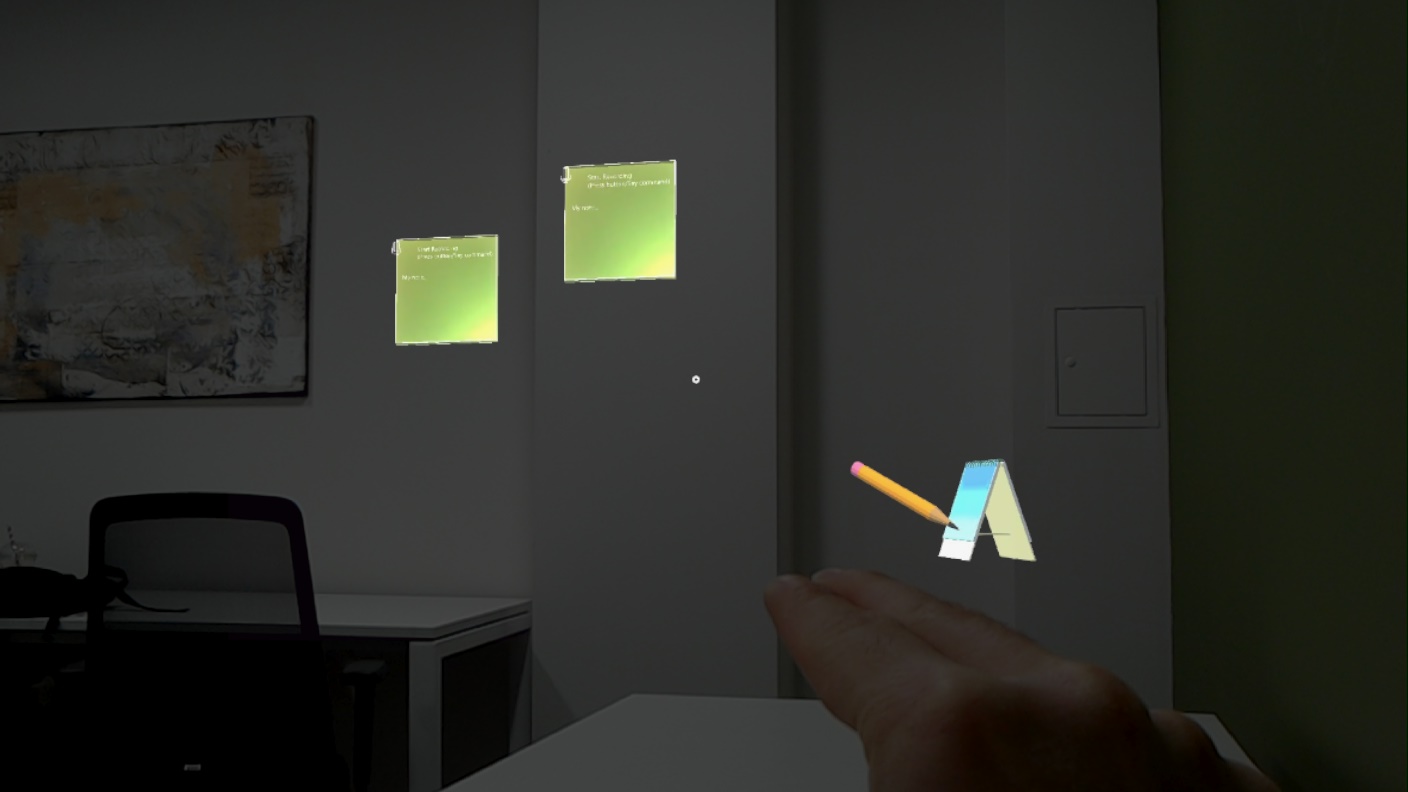
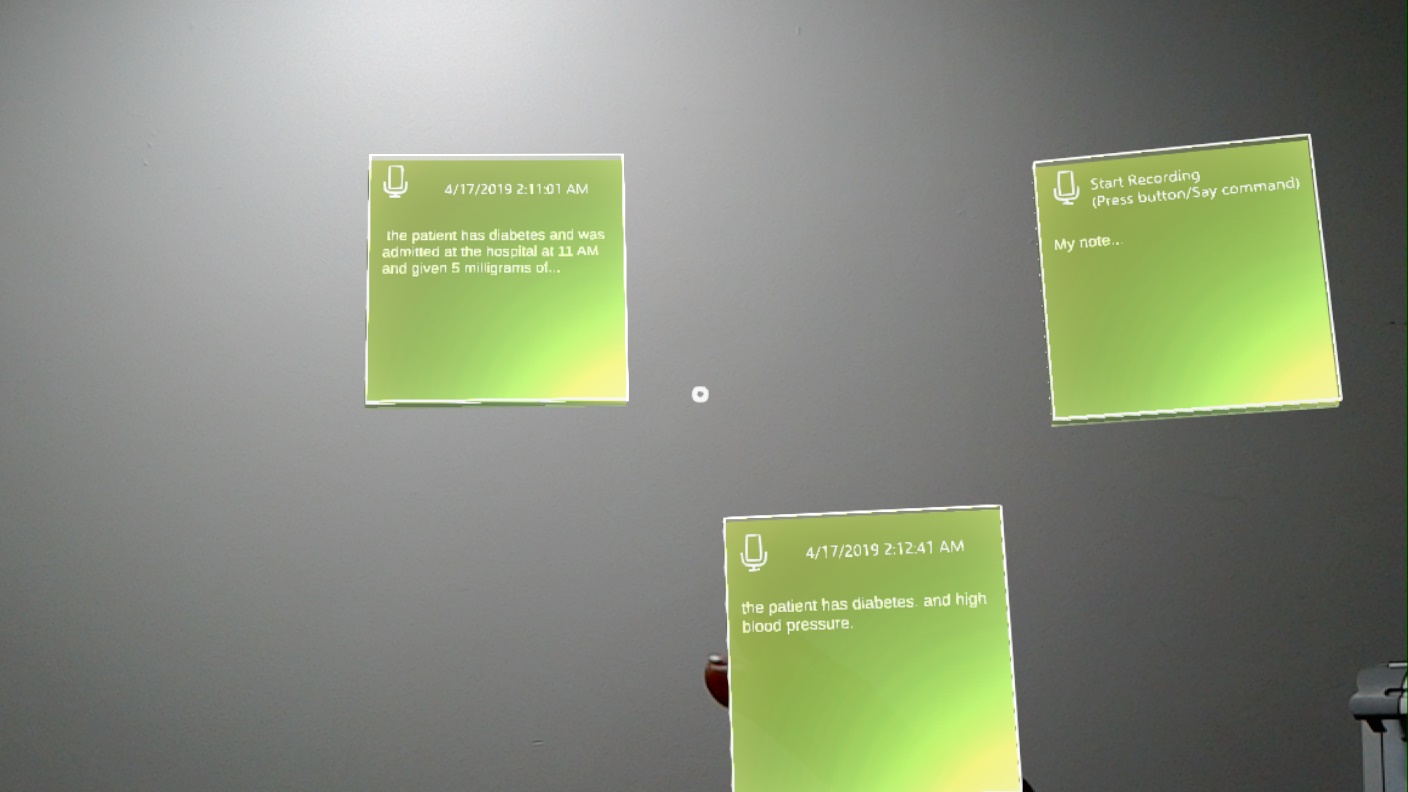
2. The notes scene, which allows the doctor to take notes while the senior doctor is talking and place them around the ward so they can be used as a reference for later.
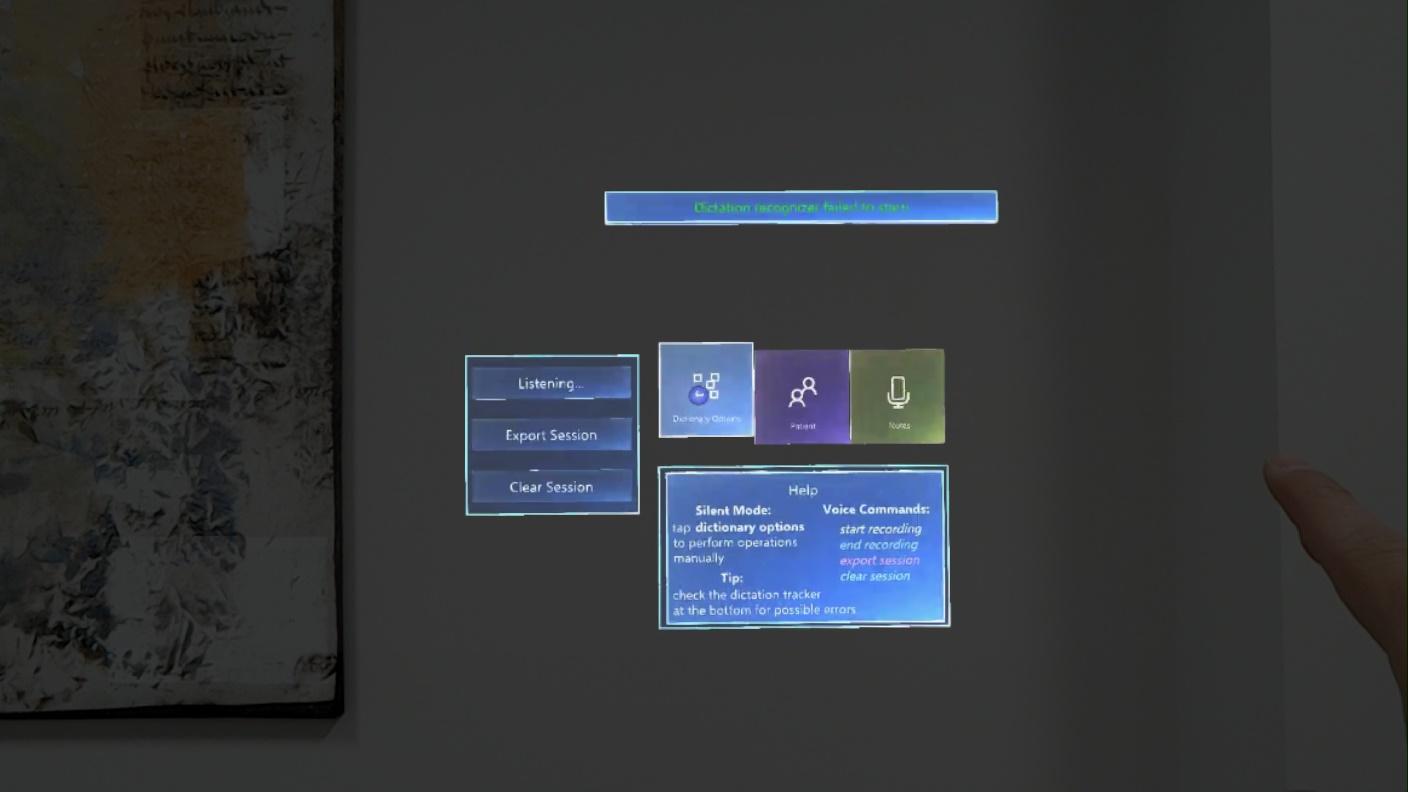
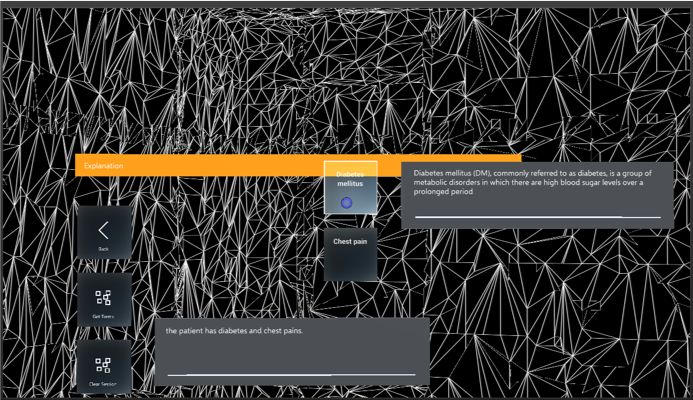
3. The dictionary scene which performs medical entity extraction from the words of the senior doctor and allows the junior doctor to view explanations and images from those words.
Automated Testing on the HoloLens - Perception Simulation
Above is an example of Perception testing going from the main menu to the patient scene
Deemed by Microsoft the "holy grail" of HoloLens testing, perception simulation allows us to simulate an actual human inside our application and observe how all the potential movements, heights and variations affect our visual interface.
Extract from the Microsoft Mixed Reality Academy:
Do you want to build an automated test for your app? Do you want your tests to go beyond component-level unit testing and really exercise your app end-to-end? Perception Simulation is what you're looking for. The Perception Simulation library sends fake human and world input data to your app so you can automate your tests. For example, you can simulate the input of a human looking left and right and then performing a gesture.
For end-to-end tests, our best bet is perception simulation, for the reason that at its core, we want our application to serve all its intented purposes. Not only in terms of code, which can be tested through the Unity testing suite, but visually as well.
Routing Tests
In order to ensure that all our scenes worked correctly we performed "routing tests" similar to those of websites, in web-development. A route was specified as for example:
Main-menu -> Medicla Dictionary -> Patient Record
This can be seen in the video below
We enabled each route by specifying the coordinates in perception simulation and adding the appropriate movements. This was not always an easy task as the solvers, which control the movement of each component relative to the camera i.e. the head smooth out the motions, which result to a slight time delay between the movement of the head and the movement of the user interface. Hence our actions had to be timed extremely correctly, these proved to be a very tedious task as it was extremely time-consuming.
An extract from the perception simulation code can be seen here:
CODE— Insert code from perception simulation with comments
HoloLens Interactions and Testing
Gaze
In order to start testing our application, we did a thorough research of what the best practices for both comfort and functionality are regarding designing Mixed Reality (MR) applications. At the core of the HoloLens experience, is "gaze" which essentially how the user selects and interacts with objects in its FOV.
Reading the MR guidelines of Microsoft, we noticed three key things which we took into consideration while developing our application.
First, is that the user is the camera, therefore we should allow the user to move around our application and not persist anything in its immediate FOV as it can become tiring and may also cause dizziness.
To comply with this guideline it meant that we had to ensure that regardless the position of the user, his view was not obstructed from "always-visible" buttons which cluttered their vision.
Solving the button-persistence issue
To solve the above problem, we always used "Solvers", these are small scripts inside the Mixed Reality Toolkit which allow for certain behaviours to be exchibited when attached to certain game objects.
As an example here is a scene, where the note creation button (calendar) did not have a solver attached, this meant that as the user moved inside the room the button was sometimes visible and sometimes not.
While indeed this meant that we did not persist the button in one place, it made it unable for our user to create a new note (without using a voice-command), hence we needed a way to have the button available whenever the user wanted it but without staying inside his view.
For the reason mentioned above we used a "radial-solver" for our two buttons in the notes scene, which meant that they were available only when the user turned towards them, regardless of where he moves in space. This proved to be an elegant and helpful solution
These fundamental practices were used throughout the other scenes as well, and a "radial-solver" was added for our menu, which we wanted it to persist in all the scenes, so the user could easily transition between them but without obscuring his view.
Gaze and comfort
Gaze in the HoloLens is ofcourse synonymous with viewing comfort, hence, we had to make sure that everything in our application was as smooth as possible, not only to make the experience as natural as possible for the doctors, but also to allow our application to be used for prolonged periods of time.
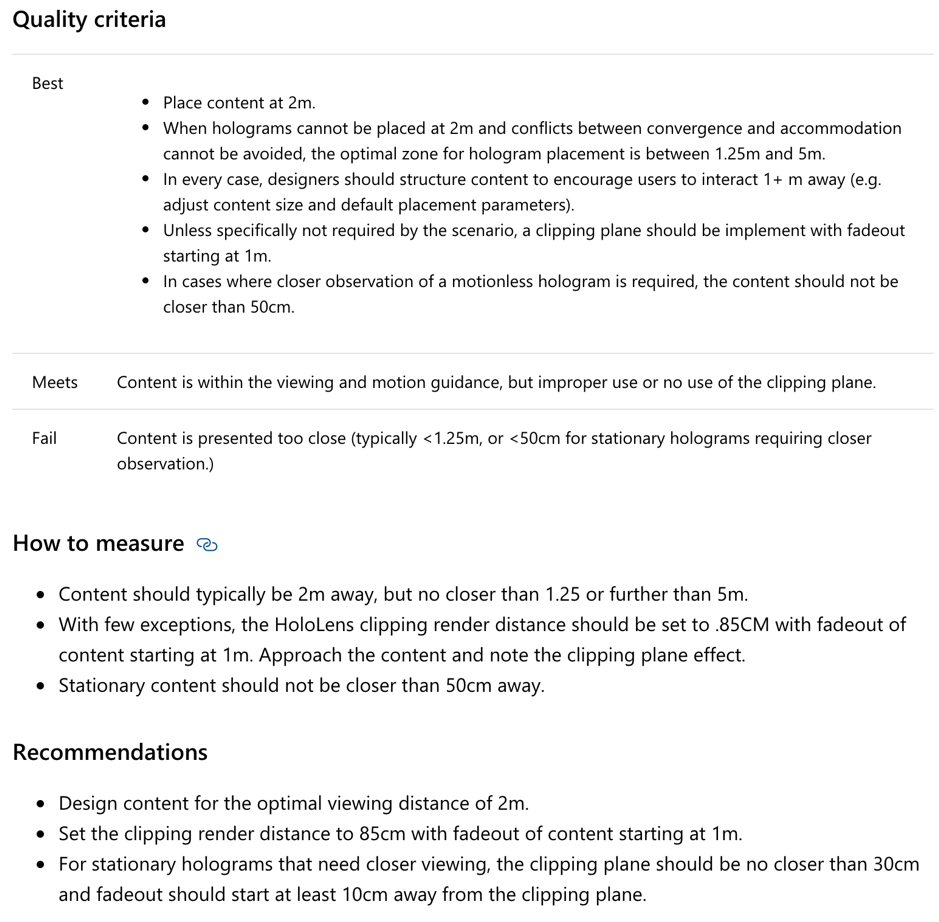
According to the official guidelines mentioned above, Microsoft indicates that all content must be placed 2 meters away from the user, following this guideline, we placed all our content with a minimum distance of 2m. One notable exception of this where the notes scene as we wanted the doctors to be able to go closer to the notes to inspect them, as the text can sometimes be quite small to view from 2m away.
Frame Rate
Another fundamental issue which required testing to get right is the frame rate. As the HoloLens has rather limited resources, the frame rate plays a huge roll in the overall experience. According to the Microsoft guidelines for "Frame Rate", the target frame rate is around 60Hz on the HoloLens platform. To ensure that, we included a frame-rate counter inside our scenes and while testing noted any drops in frame rate encountered and went back to the drawing board to see whats wrong.
Furthermore, of great use came the real-time frame rate graph provided inside the Windows Device Portal under "System Performance", this allowed a more birds-eye view of our scene and improved our development times as by recording the performance data and then cross-referencing with a video recording of our actions we could clearly see where our application was dropping frame-rate.
Another feature we used extensively was the Unity Profiler. This allowed us to test the performance of our application without the need for a physical device to be present. In addition, this gave us valuable feedback such as to which to which part of our application was the most intensive, and where we could improve it. For example, we observed that some of our animations, such as moving the button upwards upon gazing upon it, were quite CPU intensive, hence we took the decision to remove them for the sacrifice of performance. Below you can see a view while testing the application in the Unity profiler:
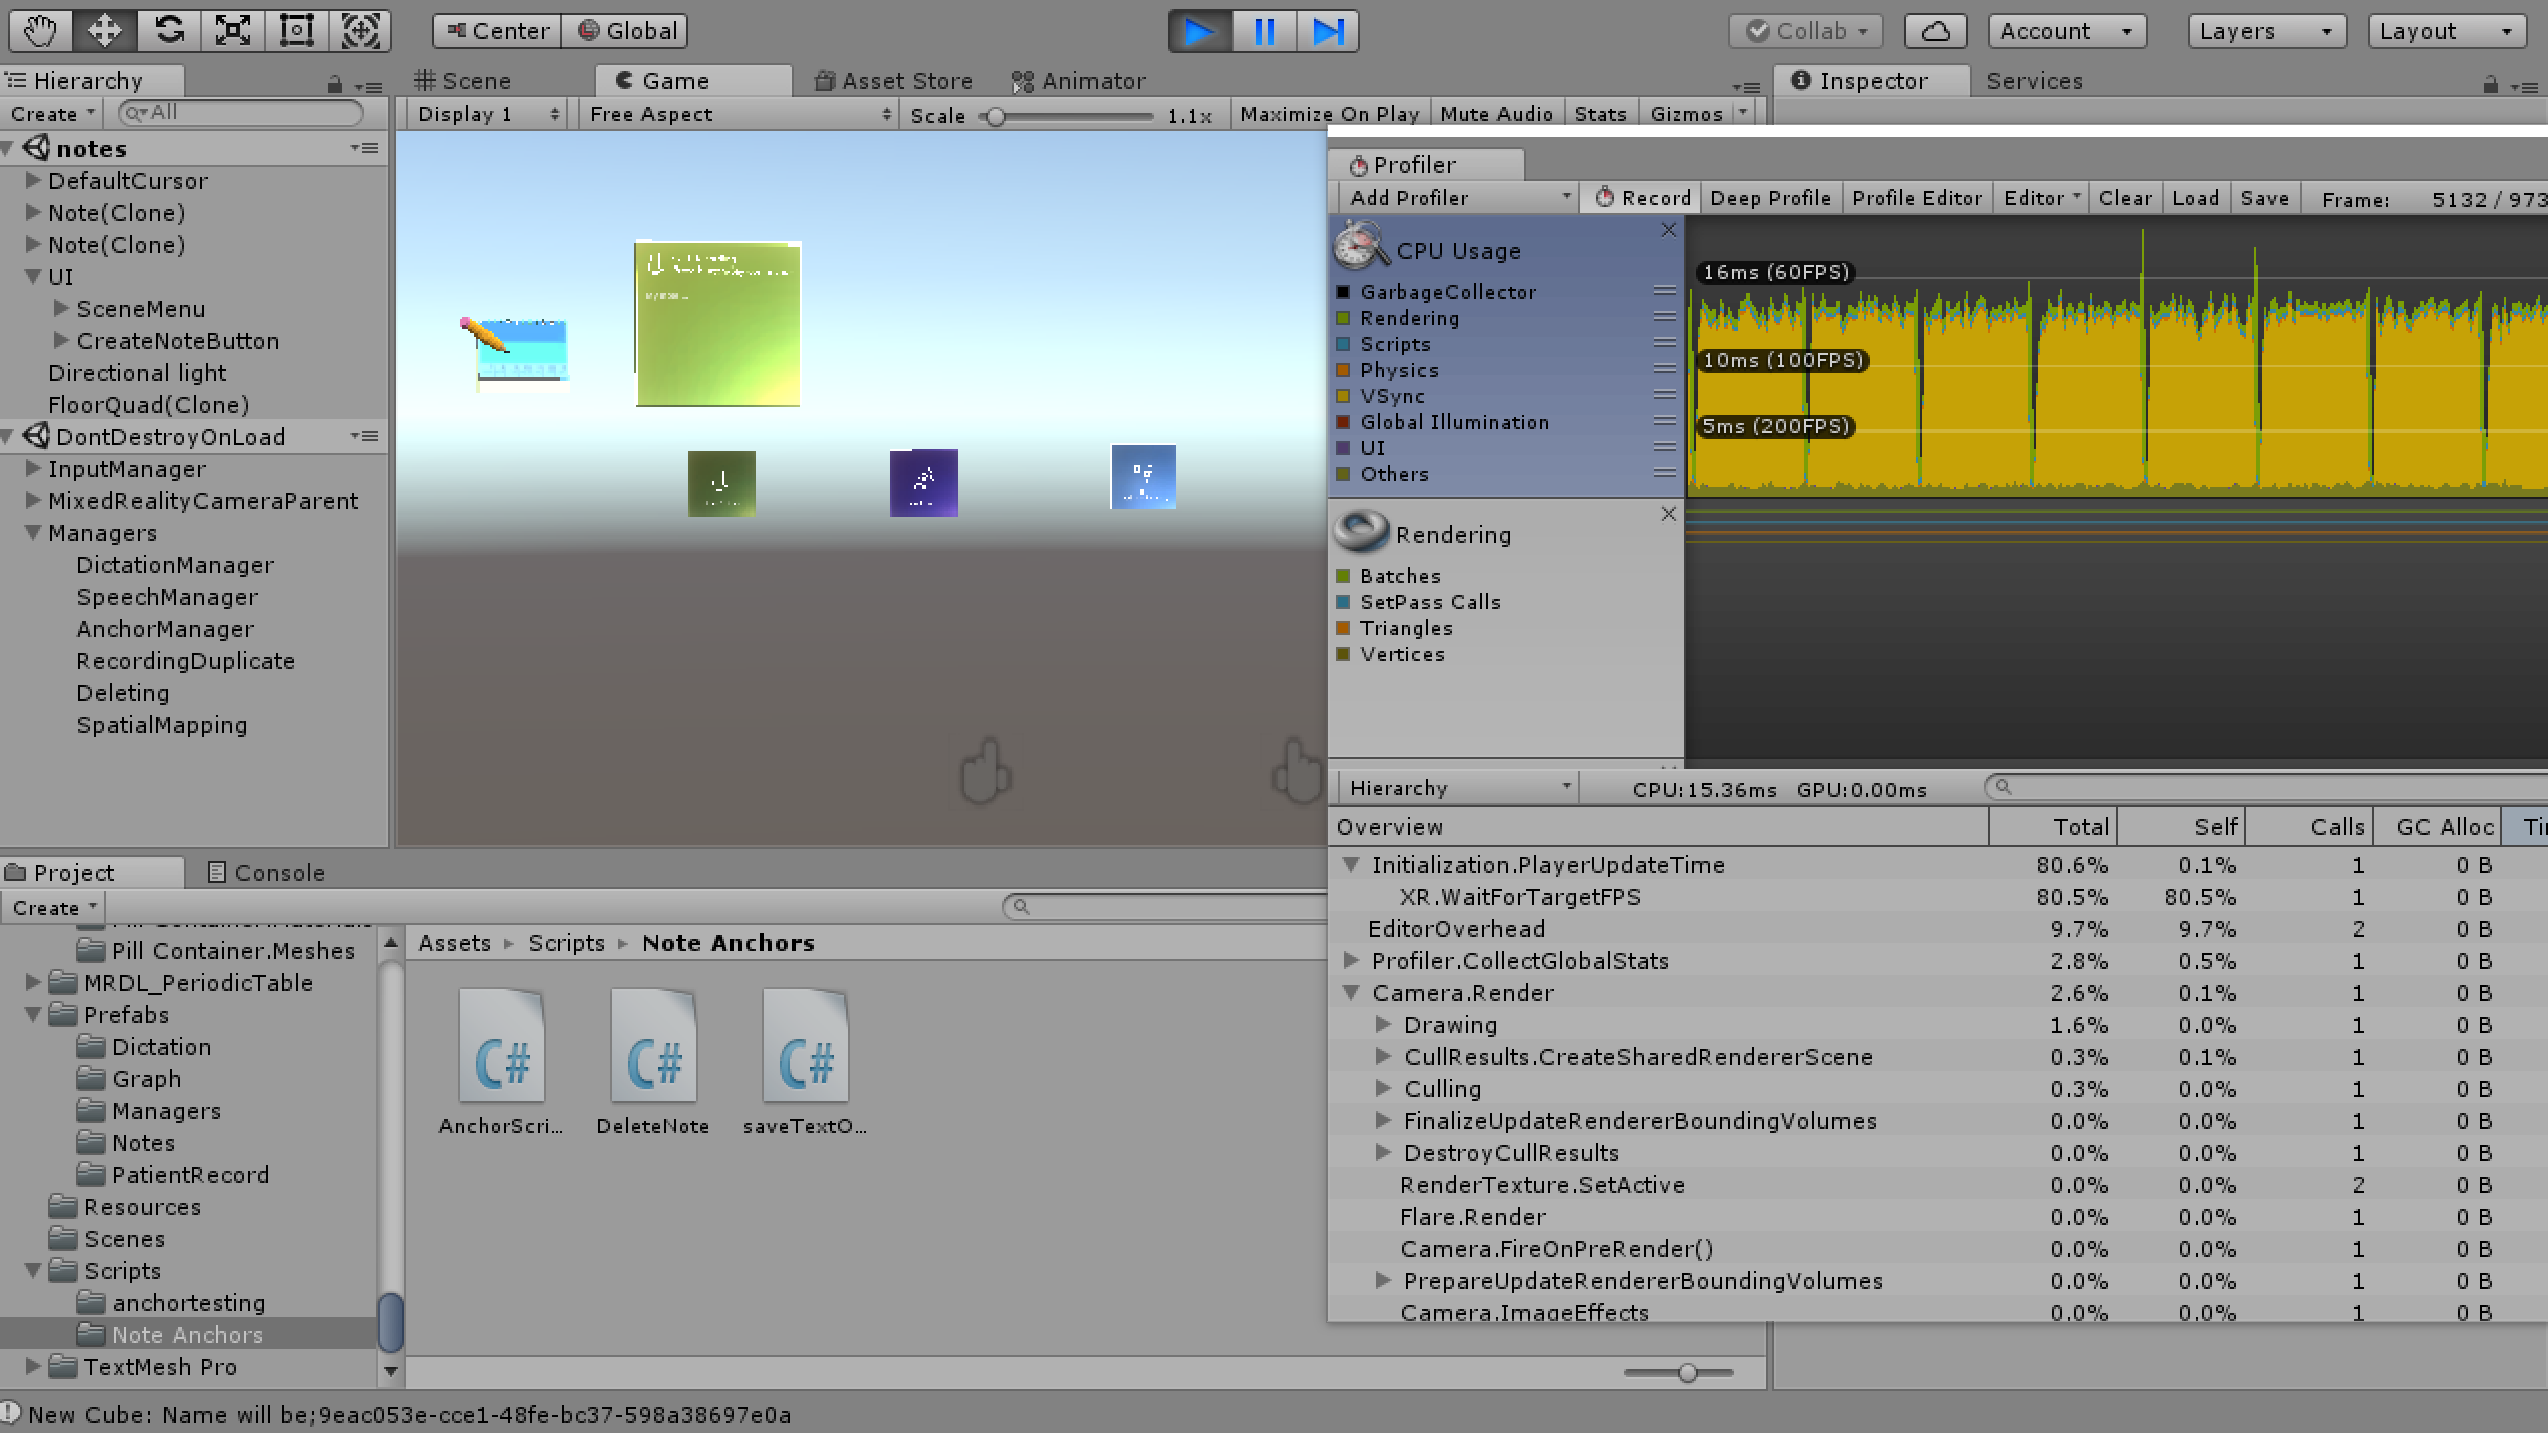
It can be clearly seen that our framerate was around 60fps which is the optimum when deploying an application on the HoloLens. Hence by doing so we met the criteria of the Microsoft Mixed Reality guidelines and elevated our application.
Focus on holographic frame (FOV) boundaries
Keeping everything in place in a Mixed Reality experience, is much more difficult than it seems. The reason behind this is, given a computer screen, we have a finite space available to show content at any moment in time. However, going into the holographic world of the HoloLens we observed that in many cases our holograms where in fact in our "world" but we couldn't see them. Initially solving this proved to be, changing the positions of our Holograms to be placed in front of the view of our user.
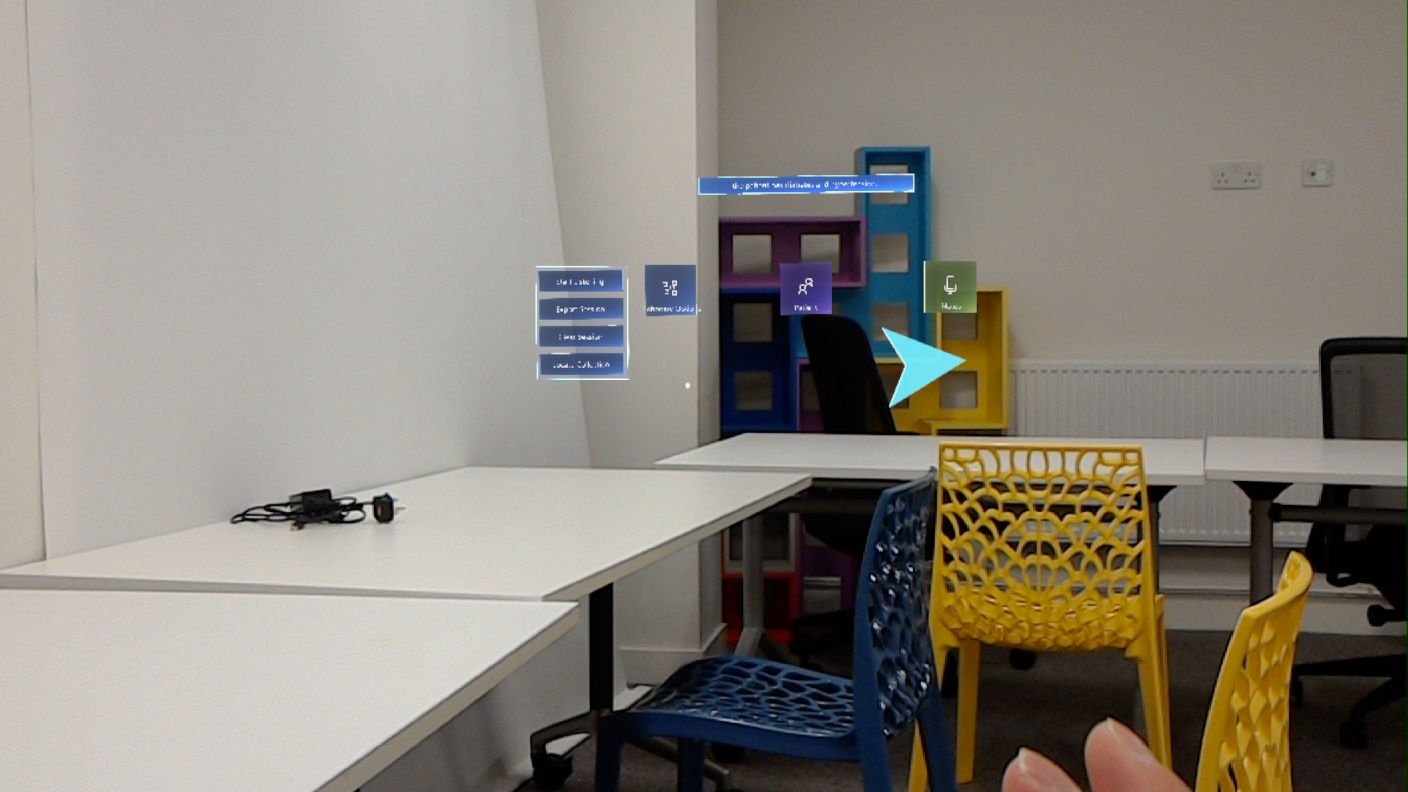
This technique failed once we started generating numerous components using generators. For example in the dictionary scene, we generate buttons with terms for each medical entity extracted. Given the limited FOV of the HoloLens, we could not possibly place all the terms as a list and still have the dictionary options and images all crammed in the FOV. This would result in a very uncomfortable experience and would also obstruct the world in the background for the doctors which according to the best practices for gaze, this is something we should avoid.
To solve this, we utilised what the HoloLens was designed for, we chose to break free from the 2D world of "monitor-like" experiences. We placed indicators on our large objects and placed them away from the main field of view of our user. This came with the great benefit that, terms could be loaded "asynchronously" in the sense that, when a new word popped-up it did not distract the doctor straight away, like a push notification for example. Instead a subtle indication pops up that all the terms, are in a certain direction. When the doctor is available, a quick glance towards that direction reveals the terms.
By providing indicators for our large objects and not placing everything inside the main field of view of our users, we comply with the quality criteria of Microsoft for ["Focus on holographic frame (FOV) boundaries"](https://docs.microsoft.com/en-us/windows/mixed-reality/app-quality-criteria#focus-on-holographic-frame-fov-boundaries) as our users never lose context and viewing is comfortable. Furthermore, this experience becomes less intrusive to the already rather invasive experience a doctor might feel using the HoloLens.
Spatial Anchors
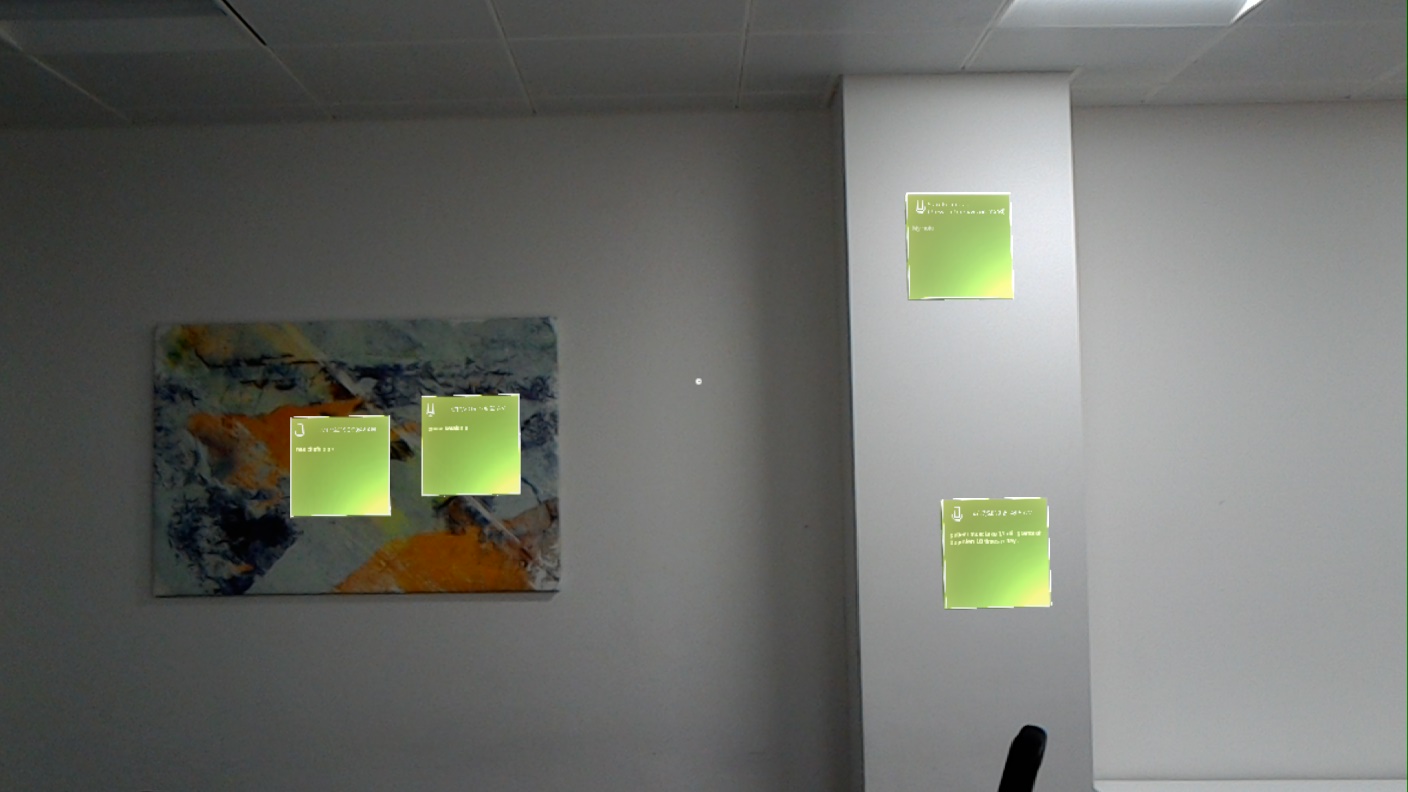
Spatial anchors are what allows our notes in our notes scene to persist throughout application runs. This means that if the doctor wears the HoloLens again then the notes are in the same positions as the last time. This is incredibly useful, considering the dynamic environment of a hospital and that a junior doctor might have multiple shifts or wards.
By storing all the spatial anchors, in our case the notes, we create overhead inside the HoloLens as this information persists in memory. Hence, by providing our users the option to clear the anchors we can decrease this overhead.
To test that our spatial anchors worked correctly we used different rooms and enabled the debugging text of the "World Anchor Manager" which is the manager responsible for allocating world anchors inside the HoloLens.
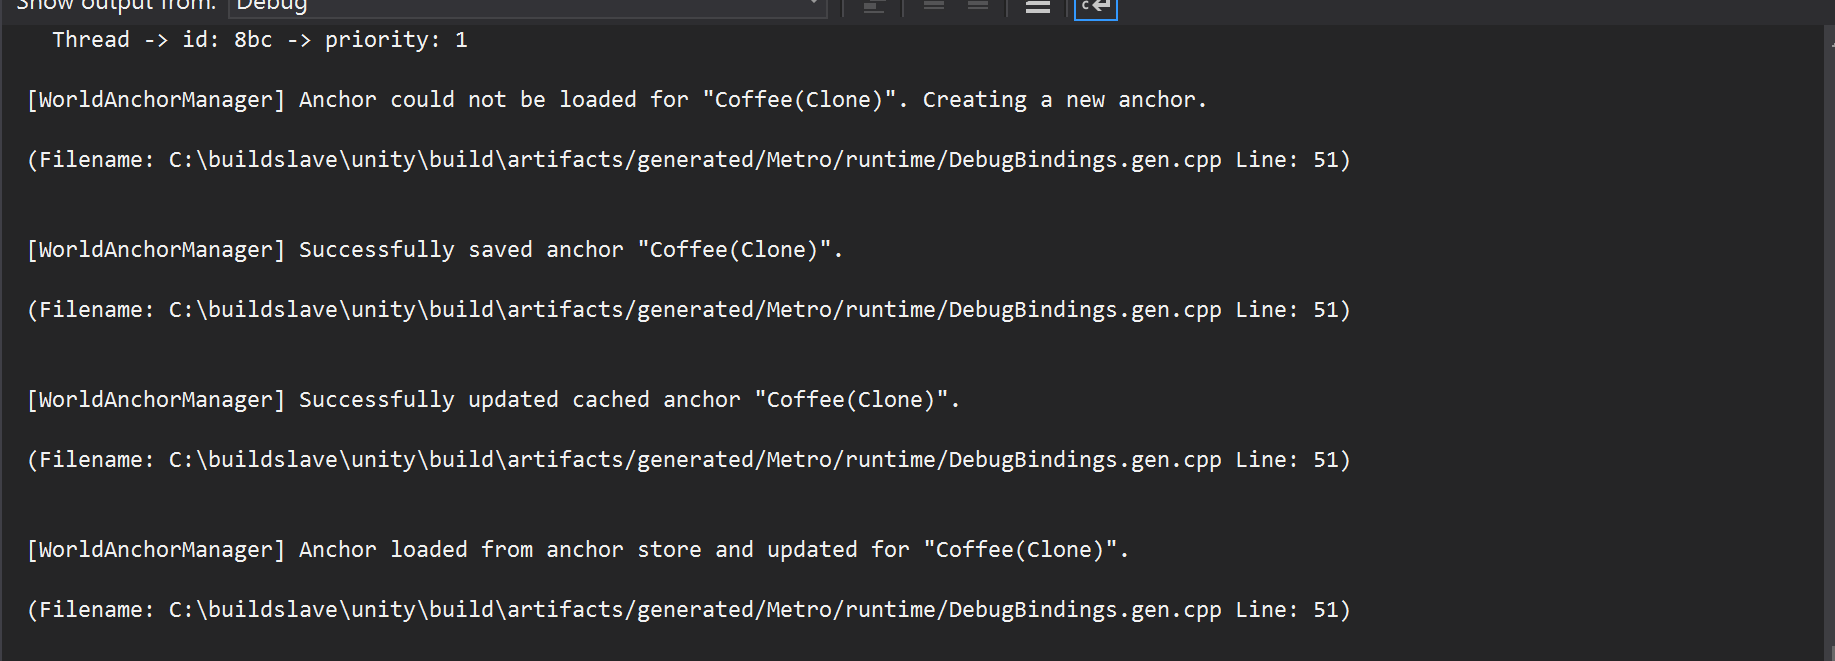
An example of Anchoring on a different surface:
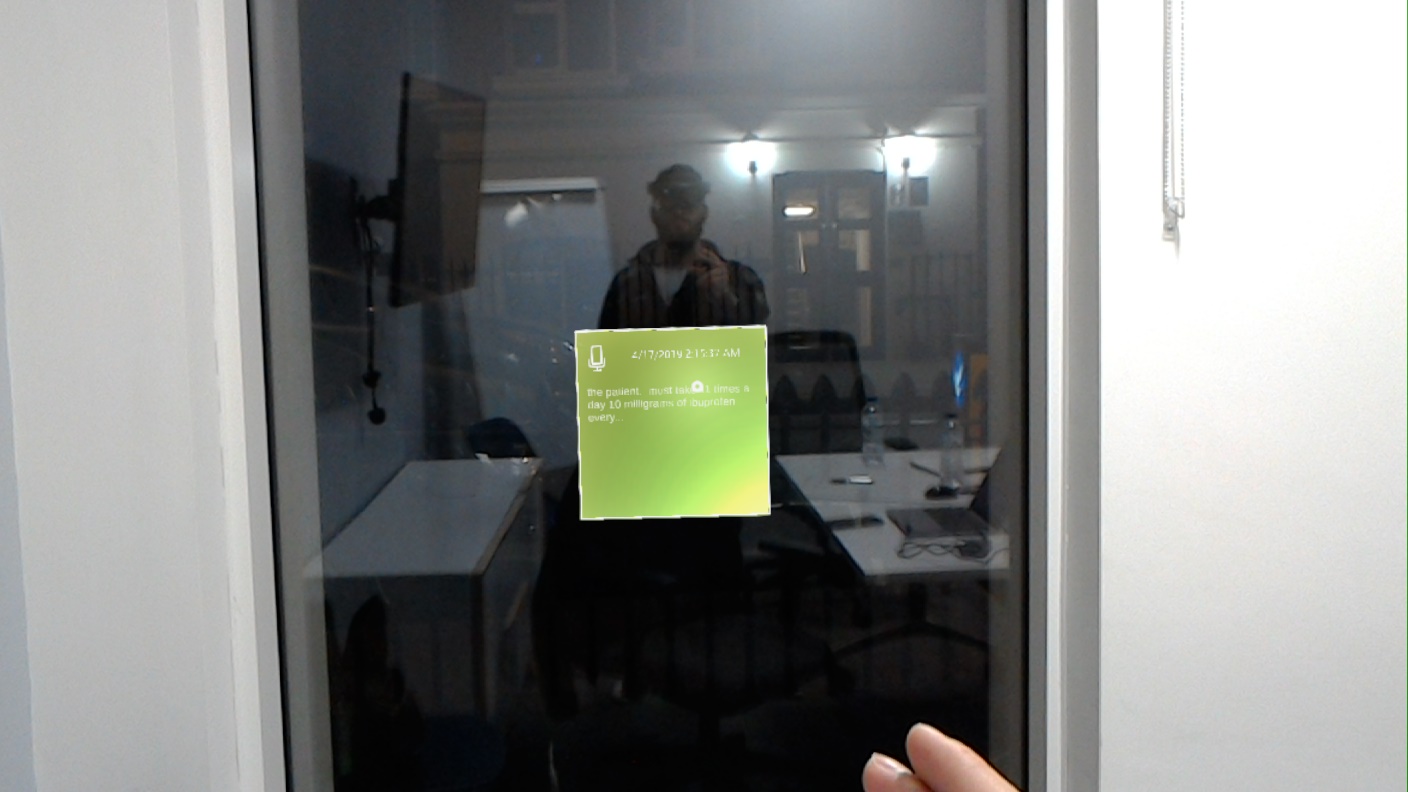
Anchoring on glass surfaces was extremely important, as it is a very common surface to be found inside a hospital. As a result, immediately our applications importance in the learning and teaching experience increases.
Due to time limitations, and the fact the extensive networking knowledge was required to synchronise between two HoloLenses, we could not enable the sharing functionality between different HoloLenses. However, the basis is the persistence of the World Anchors and the only thing left for us to do is find a way to transmit this data over the network to another HoloLens.
User Acceptance Tests with Client
To ensure that our application was aligned with what our client wanted we made sure to arrange frequent meetings, showing to our client our progress in detail and getting feedback both on the User Interface as well as potential functionality that was either lacking or could be improved.
In total we arranged 4 extra meetings from prearranged ones i.e. through UCL. In the first two meetings we made sure our vision towards the project was the same, and that we had solid understanding of the requirements. Upon finalising our requirements, we then arranged a 3rd meeting to show our prototype to our client.
We had a basic dictionary scene working, which was recognising medical terms correctly and showed an explanation along with an image for each term. However, these scene was very crude and far from finished, and our demonstration was done inside the HoloLens emulator rather than an actual HoloLens device, due to difficulties in transportation from UCL to the DRIVE office.
We discussed about the other two scenes, namely the notes and patient scenes and showed rough versions of them inside Unity, and how they will behave inside the HoloLens. This was enough for our clients to understand what we were trying to do and gave us valuable feedback as to what they would like the end application to look like.
Valuable Feedback during our meetings
Our client wanted to see possible ways which the power of Mixed Reality through the HoloLens platform could aid junior doctors during they're training in order to make it easier for them to learn complex terminology, keep notes in various places inside such a dynamic environment and finally, view patient data in an innovative way.
We incorporated all of the above in our final delivered product through close communication with our client. We always made sure that the team moved toward the direction our client and UCL wanted so as to deliver a great end-result which could eventually be used by junior doctors to make the future generation of doctors learn more material, faster and more efficient through technology.
User Acceptance tests with UCL medical students
In order to verify that our design is suitable for medical personnel we had to of course test our design with actual medical students. This proved to be extremely valuable in terms of adjusting our user interface and changing key functionalities as medical students are at the forefront of experiencing teaching in the medical field.
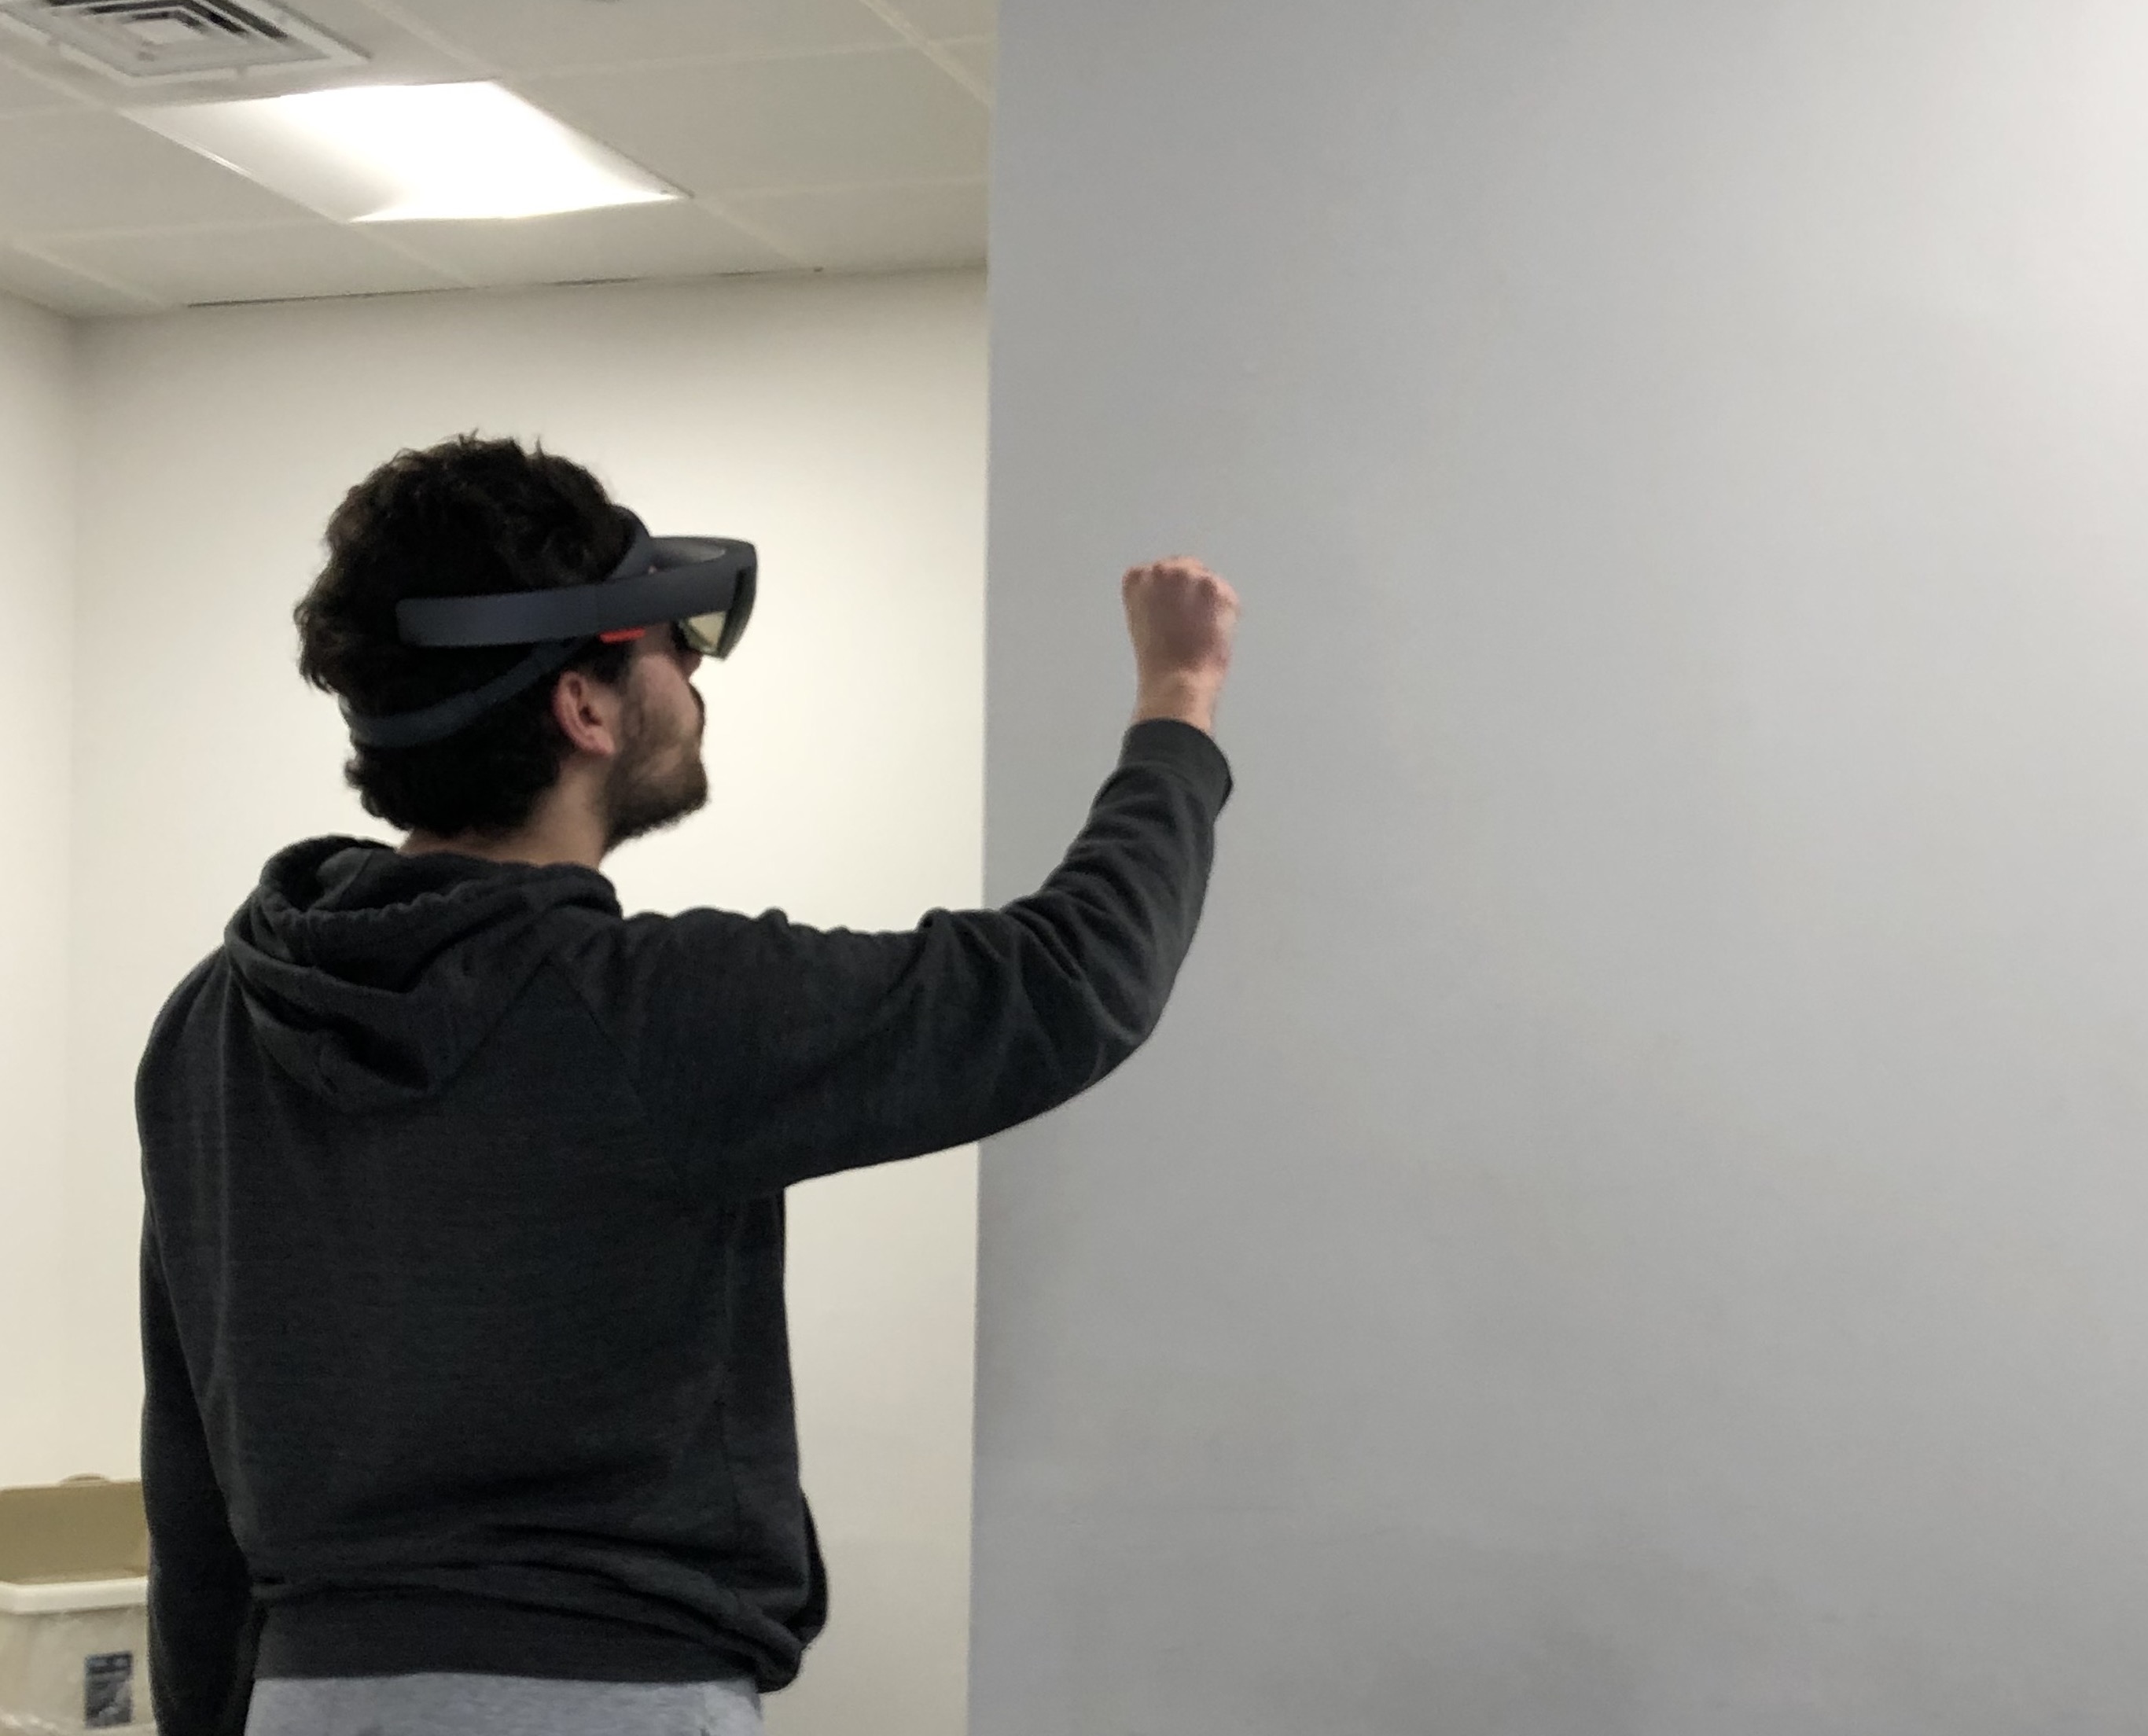
After showing the features to the medical student and explaining how the HoloLens handles input (gaze and tapping) we left them to free-roam around the room exploring mainly the notes scene and the dictionary which are the most dynamic scenes as they show medical information in real-time.
Below is a 1st year medical student exploring the notes scene, and pinning notes on the wall.
The view of the user:
Furthermore, after gathering feedback from the medical students we realised that we had to use solvers extensively in order to reduce the "tag-along" effect of having the menu stick in front of the user at all times. As mentioned earlier what solvers, well, solved, was the fact that when our users turned their head the solvers did not stay attached at a position and turned with them. Instead, they conveniently stayed outside their field main FOV and by a slight movement to the right (or left accordingly) they could view the menu again.
Another feature we added that came directly from our users and was also endorsed by the Microsoft Mixed Reality academy was the voice commands for every interaction in our application. For example, in the notes scene we noticed that our users preferred to say "Create Note" than press the button as pressing the button and then assigning a note to a wall required to gestures minimum, while the voice command required minimum one gesture of selecting the note. We then propagated this forward to each individual note and added a command "Start recording" so as to make it easier for doctors to assign phrases to sticky notes.
Unit Testing
Asides the integration testing used with perception simulation we of course had to do unit tests. To do so we used the Unity Test Runner and wrote a rather small but powerful set of tests that allowed us to examine the essentials of our application and specifically our dictionary scene.
Testing the dictionary scene was done due to the fact that it involved real-time medical extraction of data utilising NLP. The most important part is the “Object Collection” object, which is the one responsible for showing the medical terms, in a holographic format, similar to that of a sphere, so the user feels surrounded by the terms.
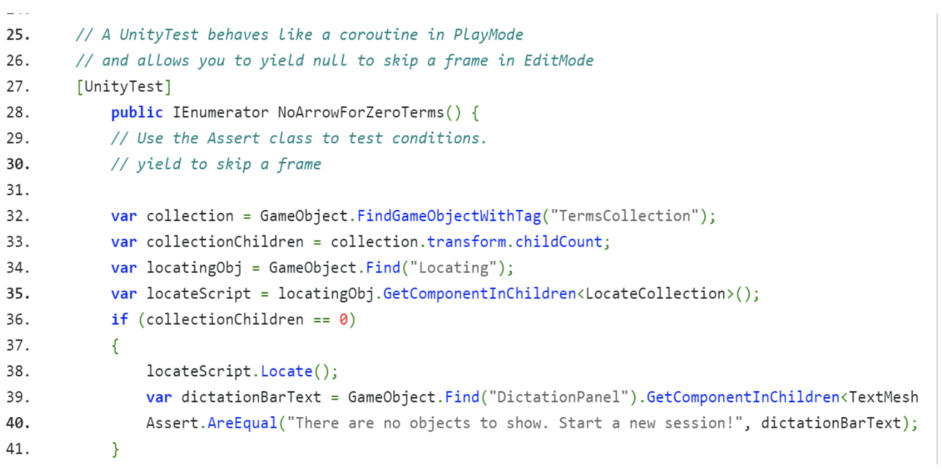
Ensuring that this object collection worked correctly was very important for our application as this piece of code was responsible for showing the medical terms, their explanations, as well as images.

While at first this might sound like high-coupling with the object collection, there is a solid explanation behind this move. We hide two options, either isolate the terms into generating a single button and then adjusting the position with an offset, or go with an object collection [reference] which is endorsed by the Mixed Reality Toolkit as the most efficient and elegant way of organising multiple elements to a user. Hence, we sacrificed from generating single buttons as it was very messy, many times the buttons did not have the correct distance between them due to the solvers attached (they make the holograms move within a radius inside your FOV). As a result an Object-Collection was used which made the UI as well as UX much more elegant.